Search

RouteSavvy User Guide – 2.2 – Multiple Address Import/Data Wizard

Preparing Data

The easiest way to add lots of addresses into RouteSavvy is importing an Excel (XLSX) or CSV file. If you want to add Individual Locations one at a time, see the Single Address Import section.

Below is a sample file showing a typical set of addresses. You can also download the sample files here:
.CSV and .XLSX

Uploading Excel XLSX or CSV files with the “Data Wizard”

The RouteSavvy Data Wizard provides a four-step upload wizard for .XLSX and .CSV files. From the Map Tab, click the Data Upload button.

Data Upload button

Step 1 – First browse to the .CSV or .XLSX file containing addresses. The file name will become your default folder name, but you may change folder names in Step 4 as desired to identify this set of Locations.

Step 2 – Once the Next button has been clicked, you will have the option to map the fields from the header row of your .CSV/Excel file to the fields required by RouteSavvy.
“Header Row” just means the first row of your spreadsheet, Row 1.  If you do not have a header row in your address spreadsheet, you can simply insert a blank row above your data and label each column. 
RouteSavvy will attempt to map the field names for you, so if you have a header called “Address1”, RouteSavvy will automatically match that to the Address1 field. Note that these may not be correct for your specific .CSV file and may need to be changed. If a field should not be used, select <ignore column>.

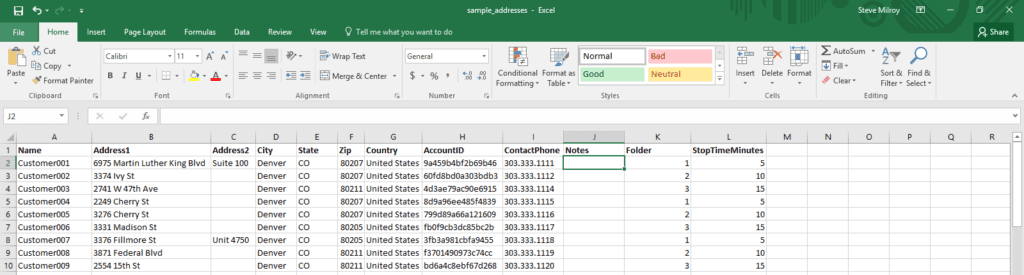
The default fields include Name, Address1, Address2, City, State, Zip, Country, Note, Note2, Note3, Note4, Note5 Full Address, Stop Time Minutes, Folder, Latitude, and Longitude.  We encourage all customers to use addresses and NOT include Latitude/Longitude unless you have a special case.

Full Address can be used as a replacement for the segmented address fields Address1 + Address2 + City + State + Zip + Country. For example: “12023 East Arapahoe Road Unit 140, Centennial, CO, 801123815, USA”

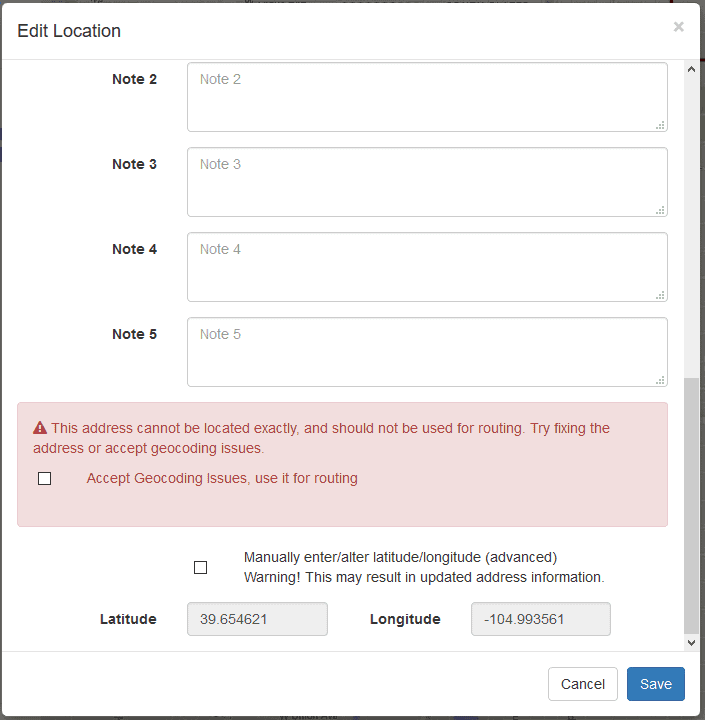
If Latitude and Longitude fields are supplied, they will be used to add a location to the map and reverse geocode address properties (where possible) will be added to the Location. Other information (full address and address segments) will be imported for informational purposes only.

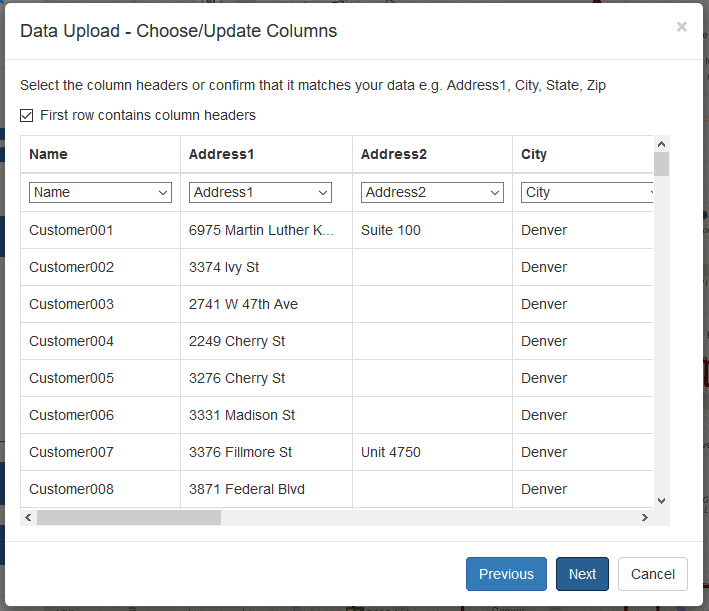
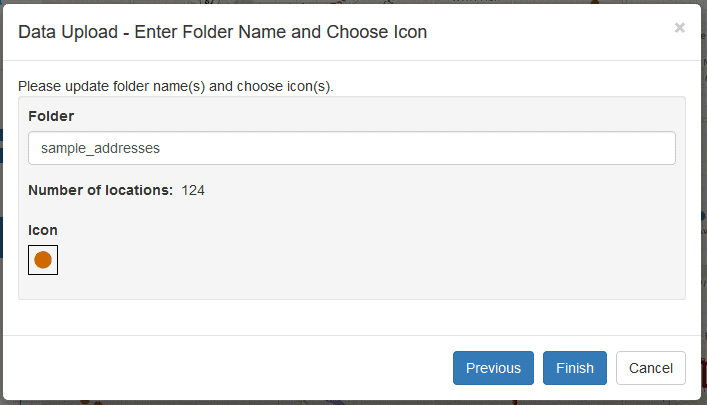
Folder Import – In the Data Wizard Choose/Update Columns, if a “Folder” name column is imported with the Excel/.CSV file then the Locations will be grouped in folders with their separate names.

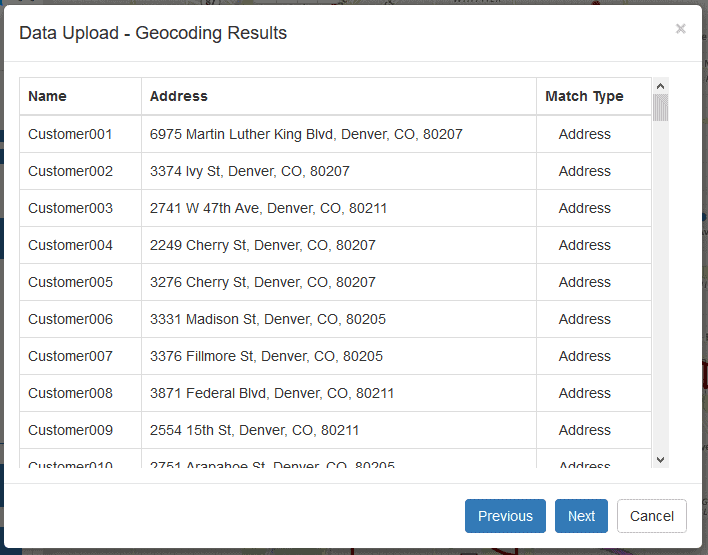
Step 3 –  Next button will geocode your locations and display a result table. The MatchType column indicates the type of geocode match. If the Match Type is something other than “Address1” or “Address2” the Location will not be useful for routing. For example, Match Type “Postcode1” means that the street address was not found and the location is based on the zipcode location. You can either go back to the CSV file to correct the address, or continue to load and correct the issue later.

Step 4 – The last step provides an option to type a Folder name other than the default file name, and select the icon type and color used for this folder and map location pushpins. If the Excel/CSV file contains a folder column with multiple names, there can be multiple folder options.

Finish button will load your locations into the RouteSavvy folder(s) and display Locations on the map with the selected icon and color.

Correcting Geocode Errors

It is common to have incorrect addresses that will need to be corrected. Any address Location which could not be fully geocoded is identified with a warning symbol next to the Location name in the Data Wizard or Location list

By right clicking on the location or wrench symbol you can select the Location Properties option to bring up an Edit Location dialog:

If there is a mistake in the address the geocode will often still return a latitude and longitude used to display the Location icon. However, this Location may be just the location of a city or postal code and will not be useful for routing and driving directions. You are given the choice to correct, delete, or use the existing Location.

 You can also use the Location move feature to move a Location to a more correct position for route planning.

If you have questions contact RouteSavvy Support.