RouteSavvy User Guide – 2.5 – Working with Folders
Folders are used to organize locations (addresses) in RouteSavvy, which is useful for organizing different driver stops, territories, days of the week etc. We advise that you take some time to consider what folder structure would be the most useful for your company’s routing needs, and you can always consult with the Support Team to discuss the options.
Folders can be created in a number of ways.
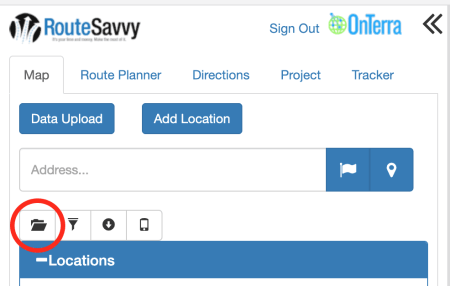
- Manually, click on the New Folder icon
2. When adding multiple locations with the Data Wizard, a Folder field can be used to split imported addresses into multiple folders. More information on this topic is available in User Guide Section 2.2.
3. Cluster into New Folders. This option is on the Wrench menu by each folder. This allows you to divide a folder into a set number of subfolders.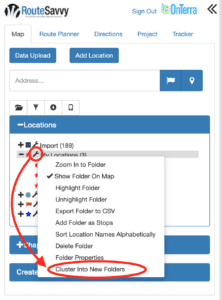
Filter Locations
The Filter Locations button opens a dialog where you can search for any location data, including the Name, Address, and Notes fields. For example, if you search for the term “smith”, you will see results for “John Smith”, “Smith Road”, “Smithville”, or any mention of “smith” in any of the notes fields. This is a powerful tool if you have a large dataset.
Please note: the Filter Locations function will filter locations in your Locations list, as well as on the map itself.
Be sure to press the “Stop Filtering” button when you want to turn off the filtering and see all of your locations again.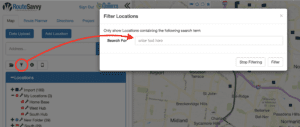
Show Mobile Device Fixed Locations
Downloads fixed locations from a Mobile Device and saves them into a new Folder.
For more information, see the Mobile Tracker User Guide.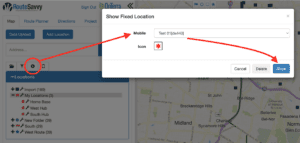
Show Mobile Device Completed Stops
Downloads Completed Stops from a Mobile device and saves them into a new Folder.
For more information, see the Mobile Tracker User Guide.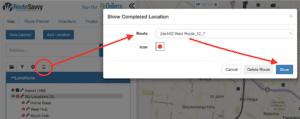
Folder Actions
Right-clicking or clicking on the wrench icon on a folder opens a context menu with a number of actions associated with folders and the locations they contain.
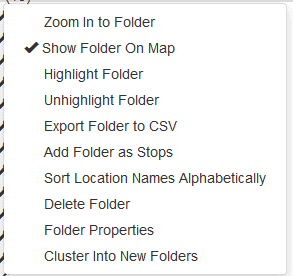
Zoom In to Folder – Zooms the map to the best view for displaying all of the Locations in the folder selected.
Show Folder on Map – This will hide/display the locations on the map, useful when you want to declutter the map to focus on a subset of locations. It will also improve performance to hide locations when working with large datasets.
Highlight Folder – Adds a yellow highlight to all of the locations in the folder
Unhighlight Folder – Removes the yellow highlight for all locations in the folder.
Export Folder to CSV – Prompts for a local file to save the current folder’s Locations as a .csv file.
Add Folder as Stops – Will add all locations in the folder as stops, see section 3 on Route Planner.
Delete Folder – Removes all the Locations from the map and deletes the folder.
Caution: This cannot be undone. If a folder is accidentally deleted, the locations can manually be added back to the RouteSavvy project.
Folder Properties – Opens a dialog window for editing the icon style and name of the entire folder. Once saved, the folder will reflect the edited features. The accept Geocoding Issues checkbox will accept a Location even if it has issues and changes the alert triangle to gray.
Cluster into New Folder – Randomly groups locations in a folder into subfolders based on their geographic proximity. Choose the number of clusters desired. The original folder remains unchanged, but the Show Folder on Map flag is turned off so the original folder is not shown on the map. Delete clustered folders if you want to try again with a different number of clusters.
If you have questions contact RouteSavvy Support.
